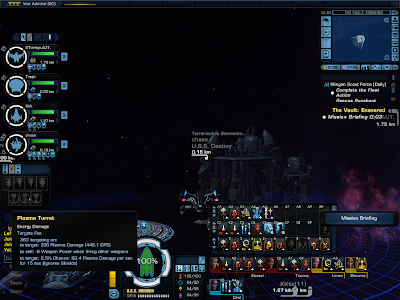
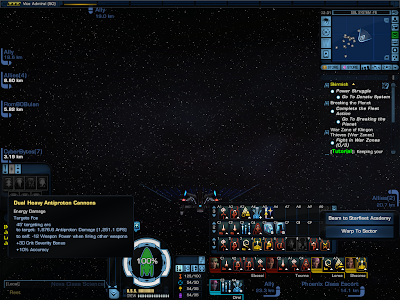
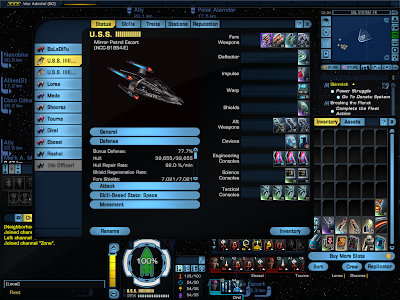
Now just like its ground counterpart, the space system and combat is equally complex and would require that I break it down into smaller sections as well...so that it can be sufficiently covered.
Maneuvering, Impulse & Full Impulse
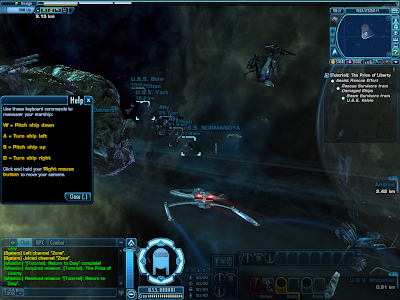
For starters, control of your starship in space can be done through the use of the same "WASD" keys. "W" and "S" makes the starship pitch up or down while "A" and "D" turns the ship left and right. The throttle of the starship is controlled through the keys "Q" and "E" where "Q" decreases the throttle while "E" increases it. "R" just simply acts as the throttle toggle whereby pressing it would alternate the throttle between zero and full throttle.
And in case you didn't know, the starship also has a "reverse" gear which can be engaged by pressing "Q" once while the throttle is at zero. There will be a flashing arrow pointing downwards (right beneath the throttle bar) to indicate that it is active and the ship is moving backwards. Do note that this "reverse" gear only has one speed and is very slow...to the point of almost crawling so the situations where you would use it is few and far between. Besides...if you stay too long in "reverse gear", your starship will eventually incur a reverse power drain penalty (on all your subsystems) so its best that you avoid using it. Anyway, to disengage the "reverse" gear, just press "E" once to stop and then a second time to throttle forward again. Its as simple as that...
Now for the impulse and full impulse part, it is basically just some STO lingo. What you need to understand from them is that both of them can be considered as just some states that your starship is in (for simplicity's sake). And that being in either of them will affect the speed at which your starship moves in ordinary space. In other words...your top speed.
During the impulse state, all of your starship's power are regulated normally and according to how you have them allocated. This is basically the state you will be in when fighting and doing battles.
The full impulse state, on the other hand, diverts all of your starship's power to its engine regardless of your power settings, keeping only the bare minimum for all other functions. This state is useful when you need to traverse long distances in ordinary space. It can only be activated when you are not in combat (red alert status). Any form of action that puts your starship into combat status will immediately kick you out of full impulse and back into the impulse state.
The toggle button to switch between these two states is "Shift + R".
Interactions in Space
Interactions in space is pretty much the same as interacting with stuff on the ground. All you need to do is fly close enough to the object and the interaction window will pop out (usually within 6 to 7 km would do). From then onwards, just press F to select or use your mouse to click on the options.
It is essentially the same thing when you are looting item drops in space. If they are yours to loot, the items would appear to you as a bright glowing object floating in space. But if you are in a team and the item looted is classified as "team loot", then a group loot window would appear and you would have to indicate your level of interest in the item as well as roll for it.
Combat
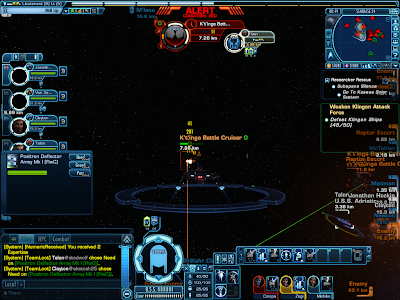
While combat on the ground is generally quick and messy, the same can't really be said for space combat. From my experiences of playing the game so far, I feel that the pace of space combat is much slower than that of ground combat. Generally speaking, you can't sink a ship as fast as you can take out a ground opponent.
And while a 1 on 1 fight in space would still be a "he who has the bigger ship wins" sorta deal, there are still mechanics in the game to make things interesting especially for group versus group clashes.
Overall, I kind of find that the space combats are much more "satisfying" than the ground ones. Since, first of all, we don't die that fast. Next, there's multitudes of tasks to be aware of while we're still alive...for example, skills, shields and power management and not to mention situational awareness...so that we don't get surrounded and focused upon.
But one tiny thing that I don't really like about space combat in Star Trek Online is that...it isn't quite as 3D as....erm....let's say..."Battlestar Galactica Online"? There is a limit to how much you can pitch up or down your ship. And because you can't turn your ship 360 degrees all round, you are forced to climb or descend via spiraling upwards or downwards to reach a target that is above or below you.
- Hotkey Bar
Basically, the space hotkey bar works in exactly the same way as that found on the ground. The two tiny buttons on the rightmost end of the bar controls the window to your available power skills (that you can hotkey) as well as the number of additional rows to your hotkey bar. The power skills available here primarily consists of space skills from your bridge officers, your own chosen career, space devices (consumables), individual firing control of your starship's equipped weapons and distribution control to your starship's shield facing hit points.
One annoying thing to note here though...is that regardless of how nicely you've setup your hotkeys, it will be easily messed up once again whenever you change to a brand new ship, change your starship's equipped weapons, change your bridge officers or their space skills learnt or whenever you level up and gain new additional power skills. This annoyance is mostly due to the game system's automatic inclusion of all new power skills to any free slots on your hotkey bars and cannot be avoided.
- Space Equipments and Devices
As far as starship armaments are concerned, a typical starship will usually consist of one deflector array slot, an impulse engine slot, a warp engine slot, a shield array slot and varying numbers of weapons, devices as well as console slots.
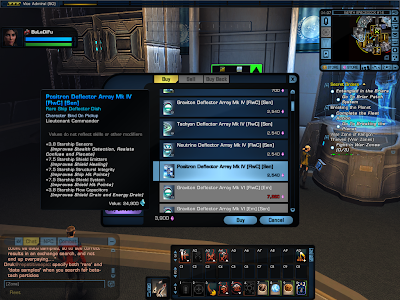
To start things off, a deflector array's purpose in a starship is to boost or improve certain functions of the starship. For example, a Neutrino Deflector Array generally works to improve your starship's resistance to debuffs while a Positron Deflector Array would boost your starship's structural integrity and shield systems.
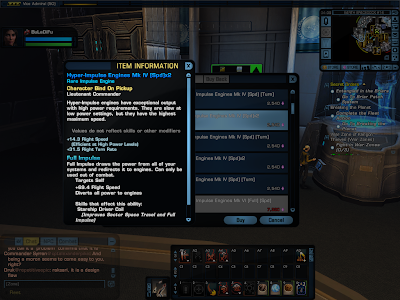
During movement in ordinary space, your starship actually moves due to the "Impulse" engine that you have equipped onboard your starship. And of course, once again, there are variants to these impulse engines. But generally-speaking, a combat impulse engine is made to be efficient at low power levels while a hyper-impulse engine is made to be efficient at high power levels.
What this means is that, you can allocate less power to your combat impulse engine (and hence more power towards your weapon systems) and still get it to work as per its specs. However, pumping extra "juice" or power into this combat impulse engine would not get as much top speed gain as a hyper-impulse engine. On a side note, there is also a regular impulse engine available if you want an engine that gives a more stable performance.
The warp engine, as its name suggests, is an engine that works only when your starship is travelling in warp space, a.k.a. sector space. It primarily controls how fast your starship can move in that space but also doubles as a tiny power source during travel in ordinary space when it isn't needed. Different variants provide a small power boost to different subsystems (weapons, shield, engine, auxiliary) of the starship.
As for shield arrays, they are meant for generating the shield that protects your starship from damage. Basically, there are a total of four general types of these shield arrays. Covariant-type shields have a larger maximum shield capacity (more shield hit points). Regenerative-type shields would regenerate more shield hit points per tick then any other types. A resilient-type shield would allow less damage to "bleedthrough" and damage your starship's hull while a normal shield array would be an average of them all.
Now for the weapons, devices and console slots, before I go into them, I would need to mention that their number of slots is actually dependent upon the ship type and tier. For example, a Tier I ship would have less weapons, devices and console slots than a Tier V ship. An escort type ship (tactical), would have more tactical console slots (but less engineering console slots) and less device slots than a cruiser type ship (engineering). And although the cruiser would have one more weapon slot than the escort, it cannot equip dual cannon and dual heavy cannon type weapons (which have the highest raw damage per second in the game excluding the torpedoes of course).
With that cleared, let us talk about starship weapons first.
- Fore and Aft Weapons
In STO, the places where you can mount weapons to are very much simplified...as in only the front (fore) and back (aft) of the starship will have weapon slots. And depending on the position of the weapon slot, the kinds of weapons that you can equip into that slot will be somewhat restricted.
But in general, a starship weapon will either have to be classified as a "Fore" weapon or it would be totally unrestricted and can be placed in both the front and the back.
To verify whether the weapon is a fore or unrestricted, just look closely at its description. Right underneath the weapon's name, in smaller font, if it says "fore weapon" then it can only be mounted in the fore weapon slots else the weapon is totally unrestricted and can be mounted in the fore or aft weapon slots.
- Weapon Type, Weapon Range and Firing Arc
There are quite a few types of starship weapons that you can use in the game. For example, dual cannons and dual heavy cannons (which I have mentioned earlier), torpedo launchers, dual beam banks, cannons, beam arrays, turrets and mine launchers.
As each of them have their own special effects when being used (as well as in combination with certain bridge officer skills), they are often used to show the uniqueness in the setup between each player's starship...which ultimately paints a very pretty scene when they all add up together, sorta like fireworks.
But anyway, before you rush off to plan your own starship's weapons setup, I must bring to your attention regarding weapon range and firing arcs lest you come up with something unfeasible for your starship.
Apart from mine launchers which doesn't have any range and firing arc limitations, all the rest of the weapon types are limited to a 10 km firing range and have their own firing arcs as well (outside of which they cannot fire).
Naturally, all of these will be stated in the weapon's description, but in general, the more powerful the weapon is, the narrower its firing arc would be. Furthermore, you would need to note that the way the weapon's firing arc is calculated is from the front-center (fore weapon slots) or back-center (aft weapon slots) of your starship, extending equally outwards on both sides.
So when planning your ship's weapons setup, what you would need to take into account is what sort of ship your piloting and what purpose it is built for, how maneuverable it is, the kind of damage output your looking for, are you comfortable with having blindspots (places where none of your weapons can fire) in your setup, etc...
- Damage Type
The damage type of starship weapons can be classified into two broad categories, energy and kinetic. And essentially, all cannons and beam type weapons can be considered as energy-based and all torpedoes and mine launchers are considered kinetic.
However, here comes the peculiar part...
While there is only one damage type for all the torpedoes and mine launchers, kinetic damage, all energy-based weapons are further divided into six specific energy-type damages...with each having their own resistance stat even. But regardless of this discrepancy, their fundamentals are still similar to that of ground weapons.
Energy (Cannons, Beams)
Phaser: Disable 1 random subsystem for 5 seconds. (2.5% chance)
Disruptor: Lower all damage resistance of the target for 15 seconds. (2.5% chance)
Plasma: Apply a non-stacking shield-ignoring plasma DoT. (2.5% chance)
Polaron: Reduce all subsystem power levels of the target for 5 seconds. (2.5% chance)
Tetryon: Deal additional damage to all shield facings. (2.5% chance)
Antiproton: Increases damage dealt by critical hits.
Kinetic (Torpedoes, Mines)*
Photon: No specialty but deals low damage and has a fast recharge time.
Quantum: No specialty but deals average damage and has an average recharge time.
Plasma: Apply a non-stacking shield-ignoring plasma DoT.
Transphasic: Increased shield penetration.
Chroniton: Reduces flight speed and turn rate of the target. (33% chance)
Tricobalt: Deals massive AoE damage and disables targets, but slow-moving and destroyable. (1 km explosion radius)
* Since all torpedoes and mine launchers deal kinetic damage, they all have the additional specialty of:
- Reducing able-bodied crew by 20%, i.e. injuring them. (50% chance)
- Killing off 10% of the crew that is still alive. (10% chance)
Anyway, the reason for purposely marking all the starship weapons into these two broad categories, energy and kinetic, is most probably due to wanting to distinguish the impact of damage upon the hull and the shields. Because as far as I know, the effectiveness of all energy-type damage upon the shields and the hull of a starship is 50-50. While kinetic damage, on the other hand, is relatively weaker against the shields but highly effective upon the hull.
At least that's what I've heard...but so far I doubt that there is much noticeable difference because despite being fully shielded, I can be easily taken out by someone hurling multiple torpedo-like "bombs" that detonates and deals AoE damage faster than I can type "Arrgghh".
For the devices slots, they are meant for a series of consumables classified as "Ship Device".
These may be temporary batteries to boost the power levels of certain subsystems or they can be stationary turrets or torpedo platforms that you release into space to help you in fights. And like their ground counterparts, you would need to equip these devices into the starship's device slots before they become usable.
Finally for consoles, these aren't really too hard to understand. Tactical consoles are used to boost your starship's ability to attack with weapons, Science consoles are mostly used to boost or defend against bridge officer abilities and Engineering consoles help to improve your starship's physical performance.
Well...although all these may be too much to swallow for the moment now, just remember that they are all meant for you to personalize and tailor YOUR starship according to YOUR own preference. So just think of the possibilities and you should do fine.
For more detailed info, please visit Star Trek Online Wiki - Starship Equipment.
- Fore and Aft Weapons
- Subsystems and Power Management
In Star Trek Online, each and every starship has a total of four major subsystems, Weapons, Shields, Engines and Auxiliary. During combat in space, a player has the ability to control how much power each of the four subsystems of his or her starship will get.
- Weapons
The weapons subsystem controls the damage caused by your energy weapons such as beams and cannons. The more power that is allocated to this subsystem, the more damage your energy weapons can inflict. It does not, however, affect the damage of torpedoes and mines.
- Shields
The shields subsystem controls your starship's shield regeneration rate as well as their ability to absorb damage. The more power that is allocated to this subsystem, the faster your shields will regenerate and the more damage your shields can absorb.
- Engines
The engines subsystem controls your starship's flight speed and turn rate. The more power that is allocated to this subsystem, the higher your maximum flight speed and the better your starship's ability to turn.
- Auxiliary
The auxiliary subsystem controls the potency of all sorts of bridge officer skills as well as your own career skills. It also affects your starship's ability to detect stealth objects or cloaked starships. The more power that is allocated to this subsystem, the better the potency and detection.
Breakdown of Power Management WindowIf you desire more information about this topic, kindly do give this a read - Starship Power Guide.
The lone button at the top alters the look of your power management window while the bottom four are preset power modes which you can customize. Starting from the left, they are Attack, Defense, Speed and Balanced respectively. These reflect the power states of each individual subsystem of the starship. The value before the slash represents the current power state which takes into account active/passive skills, various buffs or debuffs and equipment bonuses. The value after the slash represents your base power allocations (which sums up to 160 or 200). If you change your power management window to "Look 3", you will be able to customize your own power levels by using the 4 lock buttons plus the sliders and then save it to your current preset power mode for future use. Just remember that for any subsystem, your base power point allocation cannot be less than 15 or more than 100. Additionally, this power level customization apparently "follows" the ship, so you might have to repeat this every single time you get a brand new ship.
- Weapons
- Managing Shields
The above screenshot shows my starship's shields and hull taking damage. Usually, if the shields are "healthy", the amount of damage that seeps through is bearable and easy to handle. But once it becomes too "thin" or fails, that is when you start to get into trouble. Any cannon fire, beams, torpedoes or mines that comes in from that direction can easily chew and take away a good portion of your hull.
If all your other shield facings are still good, you can opt to divert power from them to your weakened one via the "Distribute Shield Power" in the "power tray" (refer to Hotkey Bar section) for even distribution or using the directional arrow keys on your keyboard to beef up a particular facing.
Do note that the rate at which you can transfer your shield power using these methods are very slow (not to mention the button mashing) so I would recommend that you resort to chaining bridge officer skills for survival instead. (Though aged, but still a good read - Shield Tanking in STO)
- Crew and Hull Integrity
As far as I know, this section might probably be useless to know but anyway...your crew is supposedly what keeps your starship up and running. By logical right, how much of your crew is being kept alive ought to affect how well each section of your starship is functioning. But in STO game mechanics, they are more or less "reduced" to being a mere anti-boarding presence and an out-of-combat hull repair team.
The state of your crew can be seen graphically at the bottom of your shield management window (right beneath your starship name). All alive and able-bodied crew are shown in a white or reddish hue, injured crew are shown in orange while dead crew are shown in dark grey. Regeneration of injured or killed crew is very slow during combat and will be slightly faster when out-of-combat.
While the exact effects of crew status are unknown, what I do know is that torpedoes and mines are highly effective at injuring or taking them out. And one viable combat strategy that I've seen is for cruisers to send out large numbers of their own crew (boarding parties) onto an enemy starship to disable its subsystems thereby making it a sitting duck.
Anyway, apart from this, it is rumored that your crew numbers also affects how fast your disabled subsystems come back online but the validity of this rumor remains to be verified.
- Throttle, Turn Rate and Bonus Defense
For the most of this part, what you need to know here is that regardless of what starship your piloting, its turn rate is practically non-existent when stationary. You will only recover your ability to turn when you have at least some throttle.
As for bonus defense, this is basically a stat that affects how easy it is to hit your starship. While how much of a bonus you will get is mostly dependent upon your starship type, there is still a minimum and maximum value which is affected by your throttle rate. At zero throttle, you will get a negative bonus (penalty) while at 100% throttle you will gain the full bonus (so it might be a good idea to always keep moving at full throttle when in a battle).
| Previous: Star Trek Online (Part Three) | Next: Star Trek Online (Part Five) |
